Installation
2022-09-01 008.384
1. Installing the Windows client
1.1. Installing the Windows client
TRIO is now distributed on CD-Rom and the autorun facility has been added so installation screen will be shown automatically when the CD is mounted on a Windows 95 system.
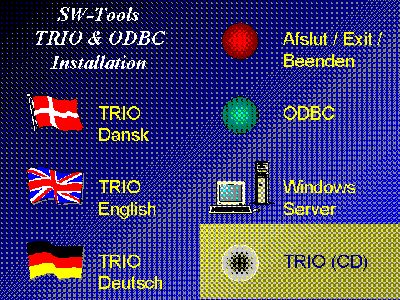
1. The CDMENU selection
You may produce diskettes from the CD, if this is done insert disk 1 in the disk drive and select
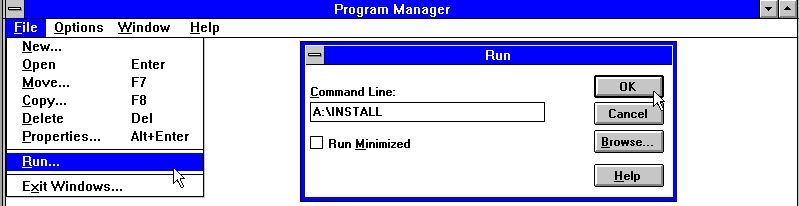
2. Running installation from Program Manager
from the Program Manager file menu. Now enter the command 'A:\INSTALL.EXE'.
The installation program will suggest the following directory for installation:
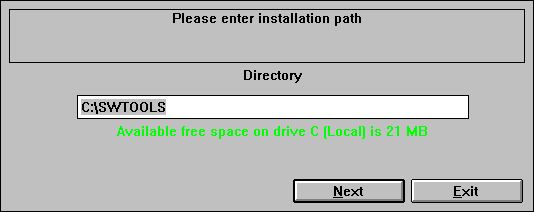
3. Installation drive and path
This directory can be changed. For example, to install the system on drive D, enter: D:/SWTOOLS
Click the 'Next' button to start the installation.
Before installation you have a possibility to select which products to install / upgrade at advance:
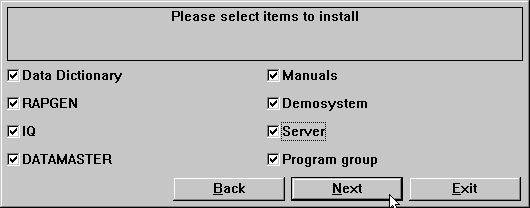
4. The installation selection
When the installation is finished a Program Manager Group named SWTOOLS is created. All applications and on-line manuals are inserted as icons in this group.
1.2. Running TRIO from the CD
If you select the TRIO-CD installation a demo system will be created on the harddisk using a minimum of diskspace. All programs and help manuals will be taken from the CD.
1.3. Entering license information
5. License program
Before the system can be used a license code is required. Please refer to the 'SW-Tools Licensing' manual.
1.4. Version number
The TRIO version number is found in the HELP-ABOUT menu or on any print of documentation from TRIO.
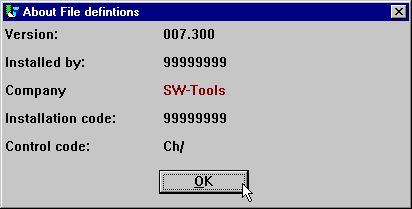
6. TRIO Version number
As shown the 32 bit version states 007.3xx as 300 is added to the minor version number.
2. Installing the Server
The Data-Dictionary provides, apart from ODBC, a client/server interface. This interface uses TCP/IP as network access to UNIX machines. (Microsoft Windows Socket or Lan Workplace 5.0)
The client side is the applications for Windows and the UNIX side is a server application with the same drivers as already described, except for ODBC. This means, X-BASIC and C-ISAM files etc. can be accessed from the Windows applications.
There are two things needed to use this solution:
1. The Windows client must have access to TCP/IP
2. The UNIX server has to be installed and started
2.1. Windows TCP/IP - \windows\services
Before the client can get access to the server it needs to have a known service defined in the
\windows\services
file (\windows\ should be the actual path where TCP searches for the services file). Use an editor, for example 'edit', to edit the file and add the following line:
mosock 2000/tcp swtoolsclient
There has to be at least one blank character between the three entries. If another number is used on the server than port 2000/ the same number must be used here.
2.2. Installing the UNIX server
The installation now has buildin FTP access for easy transfer of the server program onto the Unix system.
7. The FTP specification by server installation
If the server is delivered on diskette instead you should login on the UNIX machine and perform the following commands:
# mkdir /swtools
# cd /swtools
# cpio -icvB -I/dev/floppy
# chmod 0777 swtusock
The /dev/floppy is to be changed to the device name of the floppy drive.
The disk was made using: # ls . | cpio -ocvB -O/dev/rfd0135ds18
2.2.1. UNIX TCP/IP - /etc/services
Before the server can be started it needs to have a known service defined in the
/etc/services
file. Use an editor, for example 'vi', to edit the file and add the following line:
mosock 2000/tcp swtoolsserver
There has to be at least one blank character between the three information's. If port 2000/ is already defined you should pick another free number just remember that the same number should be used on the client side.
2.3. Starting the UNIX server
The server may be started by just:
# ./swtusock&
2.4. Shutdown of server
The server may be killed or stopped with the following command:
# swtusock -q
2.5. The UNIX init scripts
The start/stop of the server may be placed by the system administrator in init scripts as the following:
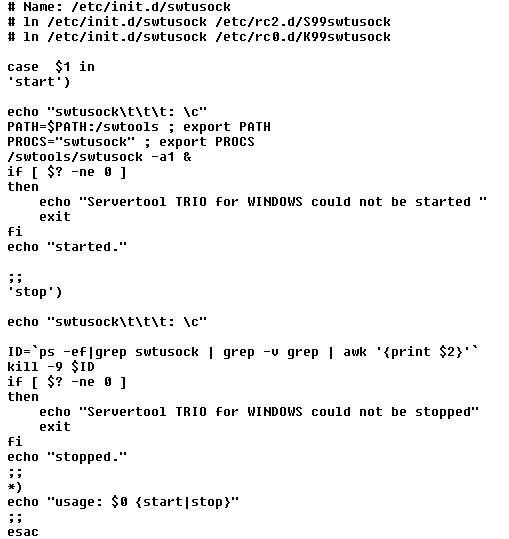
2.5.1. TCP/IP server
In the /etc/tcp file using something like:
....
PATH=....:/swtools
PROCS=".... swtusock"
....
swtusock&
echo ""
;;
stop)
....
2.5.2. LAN workplace server
A LAN network is set up just like a network using Windows socket. In the /etc/init files using something like:
8. Init script for a LAN server
2.6. Notes on different hardware platforms
2.6.1. SCO Unix
The floppy device is usually named /dev/rfd0135ds18
2.6.2. SNI RM400/600
The floppy device is usually named /dev/at/flp/rf0t
2.6.3. IBM RS6000 (AIX)
The floppy device is usually named /dev/rfd0
2.7. Server program options
2.7.1. Server status and opened file overview
When the server program is running you may use the following parameter to obtain status of connected clients:
# swtusock -s
To obtain an overview of opened files:
# swtusock -f
2.7.2. Server test mode
The server application may be started with the parameter -v in order to get verbose print of send/receive packages:
# swtusock -v
This mode provides one line on the standard output device each time a client is connected or sends a package.
2.7.3. Server debug mode
The server application may be started with the parameter -d in order to get debug mode of opened files:
# swtusock -d
This mode provides a full screen view of opened files. The function must be terminated by killing the process. Use [DEL] or [Ctrl+C] to kill it.
2.7.4. Server compress mode - Optimise performance
The server application may be started with the parameter -c in order to get compress send mode:
# swtusock -c &
This mode allows the server to compress the data before being sent to the client. The mode may optimise the time used on the network by 40 percent or more.
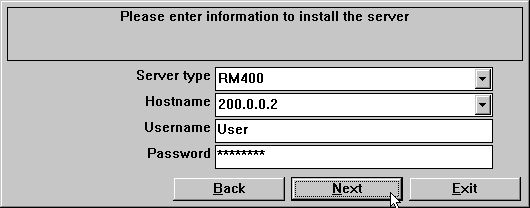
2.8. Installing the Windows 16/32-bit Server
To install the server diskette execute the command 'A:\SETUP.EXE' from the program manager.
3. Loading X-BASIC COMET file definitions
3.1. Installation and setup of the X-BASIC filesystem driver
9. Installing X-BASIC driver
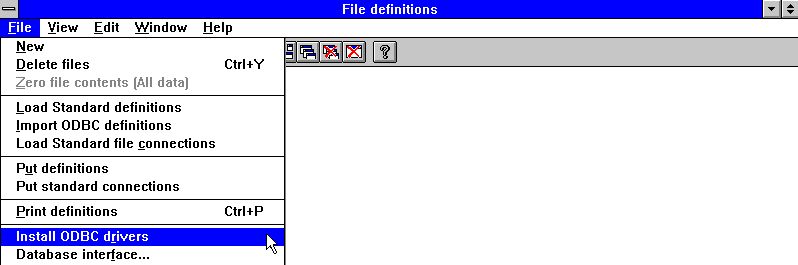
Before the X-BASIC filesystem can be used, it must be installed as a driver in the SW-Tools 'Data-Dictionary'. The driver you can install is named 'X-Basic' or for read/write access 'Ctras Quattro/Sinix'. Please refer to the 'SW-Tools Data-Dictionary' manual 'Chapter 2', 'Chapter 3' and 'Chapter 12'.
If you are working with a Quattro system instead of a UNIX X-BASIC system, you must install the 'Ctras Quattro/Sinix' driver. Please refer to the 'SW-Tools Data-Dictionary' manual 'Chapter 2', 'Chapter 3' and 'Chapter 12.5'.
3.2. Loading the COMET file definitions
When using COMET version 3.1 (or higher) or if you have COMET VIEW installed the COMET system contains the definitions of all files, such as customers, articles etc. In order to load these please follow the next section step-by-step.
3.2.1. Create and open a new subsystem
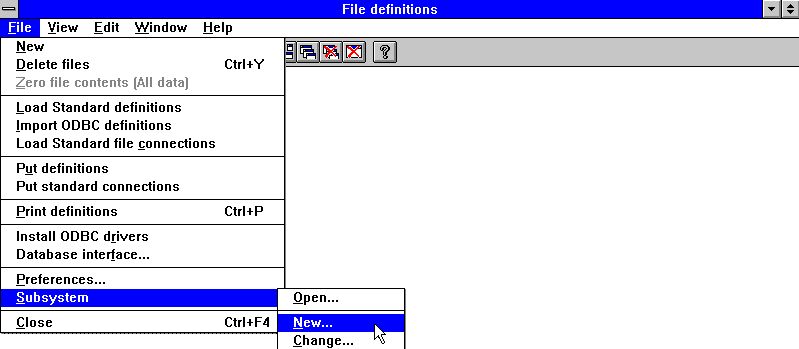
10. Data-Dictionary menu for subsystem creation
So that you do not overwrite the SW-Tools demo system, create a new subsystem. The subsystem must have its own local directory for file-definitions and reports. For example:

11. Create a subsystem for COMET
For more information please refer to 'SW-Tools Data-Dictionary' manual 'Chapter 11'.
3.2.2. Import the file definition

12. Data-Dictionary menu for file definition import
You may now import all the file definitions. Please refer to the 'SW-Tools Data-Dictionary' manual 'Chapter 12.3'.